Configuring Roaming Profiles in XenApp/XenDesktop 7.6 using Citrix UPM
- Sep 3, 2015
- 3 min read

Profile Management Configuration Options
Profile Management Configuration Options
The latest version of Citrix User Profile Management can be downloaded from:
There are three methods of configuring Citrix Profile Management:
• Citrix Studio • Microsoft group policy • .ini file
In this page I will detail the Citrix Studio method of configuring Citrix User Profile Management. The Microsoft GPO method is similar using .admx. Something to note during this process is that Citrix Studio Policies and Microsoft GPOs both override the .ini file. So any changes you might have made to the .ini file will be overridden by what I am outlining herein.
The high level steps of configuring Roaming Profiles in XenApp and XenDesktop are as follows:
1. Create a User Profile Store 2. Create and Share the User Store Folder 3. Edit NTFS Permissions 4. Enable access-based enumeration 5. Enable Policies 6. File and folder exclusions
Create a User Store
Create and Share the user store folder
1. Make sure file and print sharing is enabled on the file server which you intend to use for the User Profile Management Store. This can be configured under: Control Panel > Network and Internet > Network and Sharing Center > Change Advanced Sharing Settings.

2. On the file server that will host the file share, create a new folder named CTXProfiles or something to that effect.

3.Share the Folder. Allow 'Everyone' Read/Write permission.

4. Navigate to the Properties of the CTXProfiles folder we just created and click on the Sharing tab, then 'Advanced Sharing' button.

5. Click Caching and select No files or programs from the shared folder are available offline. OK & Close


Configure NTFS Permissions
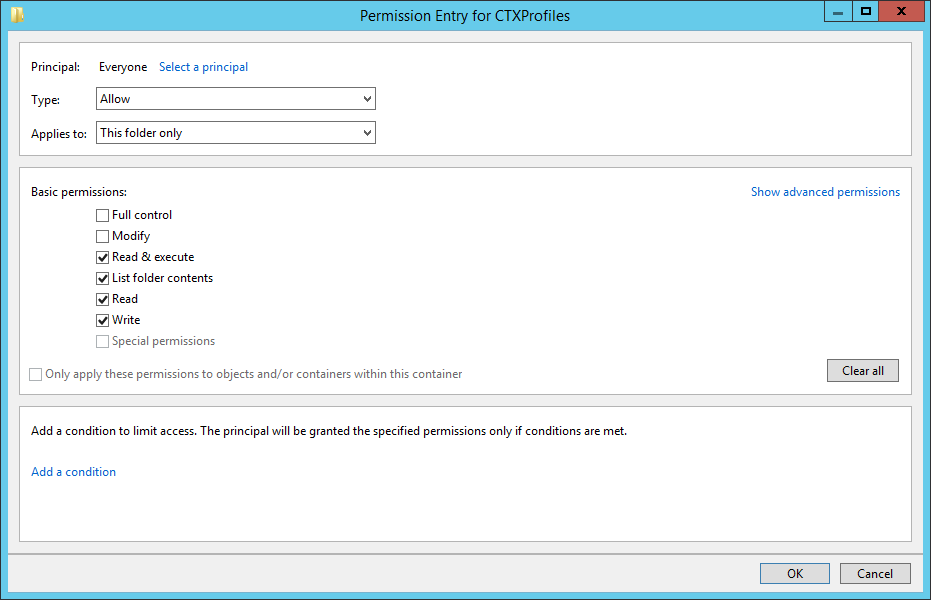
1. Navigate to the Properties of the CTXProfiles folder. Choose the Security tab and click Edit.

2. Highlight 'Everyone' and remove Full Control and Modify permissions. Ensure Write IS enabled so users can create new folders.

3. Add CREATOR OWNER. Give this group Full Control. This allows users Full Control of the folders they create within their Roaming Profile.
4. Click the Advanced button.
5. Highlight the Everyone principal and click Edit.
6. Change 'Applies to:' to This folder only. Click OK, OK, OK. This prevents the Everyone group permission from accessing other users profile folders.
Access Based Enumeration
With Access Based Enumeration enabled, users can only see the folders to which they have access. All other user profile folders will not be visible to the end user.
1. In Server Manager, on the left, click File and Storage Services.
2. Select Shares. Note: If you don’t see Shares then a reboot is more than likely needed.
3. Right-click the new share we just created (CTXProfiles) and click Properties.

4. On the Settings page, check the box next to Enable access-based enumeration.

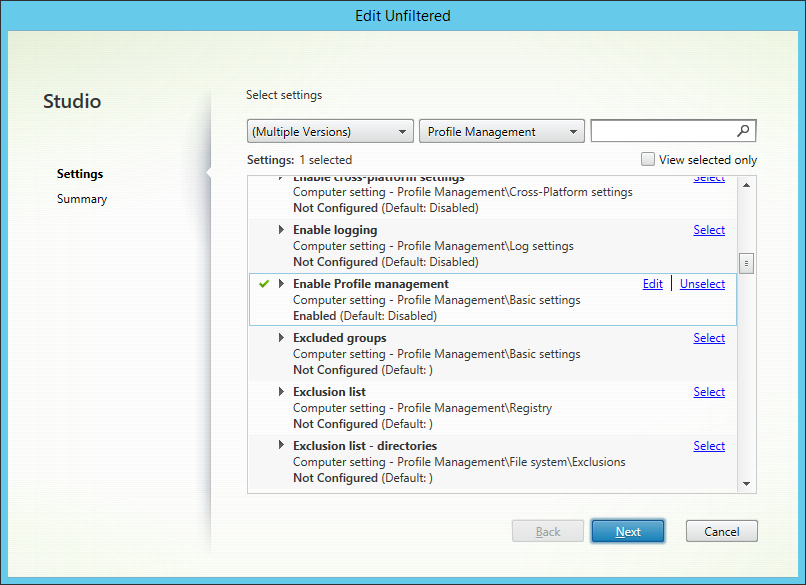
Enable Policies Access Citrix Studio from where ever you have Studio installed. If you don’t have Studio installed on a management machine, you can always access it from the Delivery Controllers. 1. Enable Profile Management.
2. Enable Path to User Store - \\YOURSERVERNAME\CTXProfiles\#SAMAccountName#\
\\server\share\#SAMAccountName# stores the user profile to the following UNC path: \\sever\share\username% for the current user.
a. If multiple domains are user, change #SAMAccountName# to %username%.%userdomain% - Note: each user account will have separate roaming profiles in each domain.

Optionally the following settings are also recommended.
1. Active write back – If users are logging into multiple VDA servers concurrently and need mid-session changes/files to be saved back to the profile store, enable this policy. Keep in mind, enabling this puts additional load on the file server.
2. Enable Process Internet cookie files on log off – This will prevent profile bloat from sustained web browsing.

See 'Citrix User Profile Inclusion and Exclusion' for recommendations on which directories and files you should include in your roaming profiles.


Comments